Taking An Inventory
Taking Inventory
After you have added your products to your site, the next step would be to take an inventory of what you have on hand.
Inventory Overview

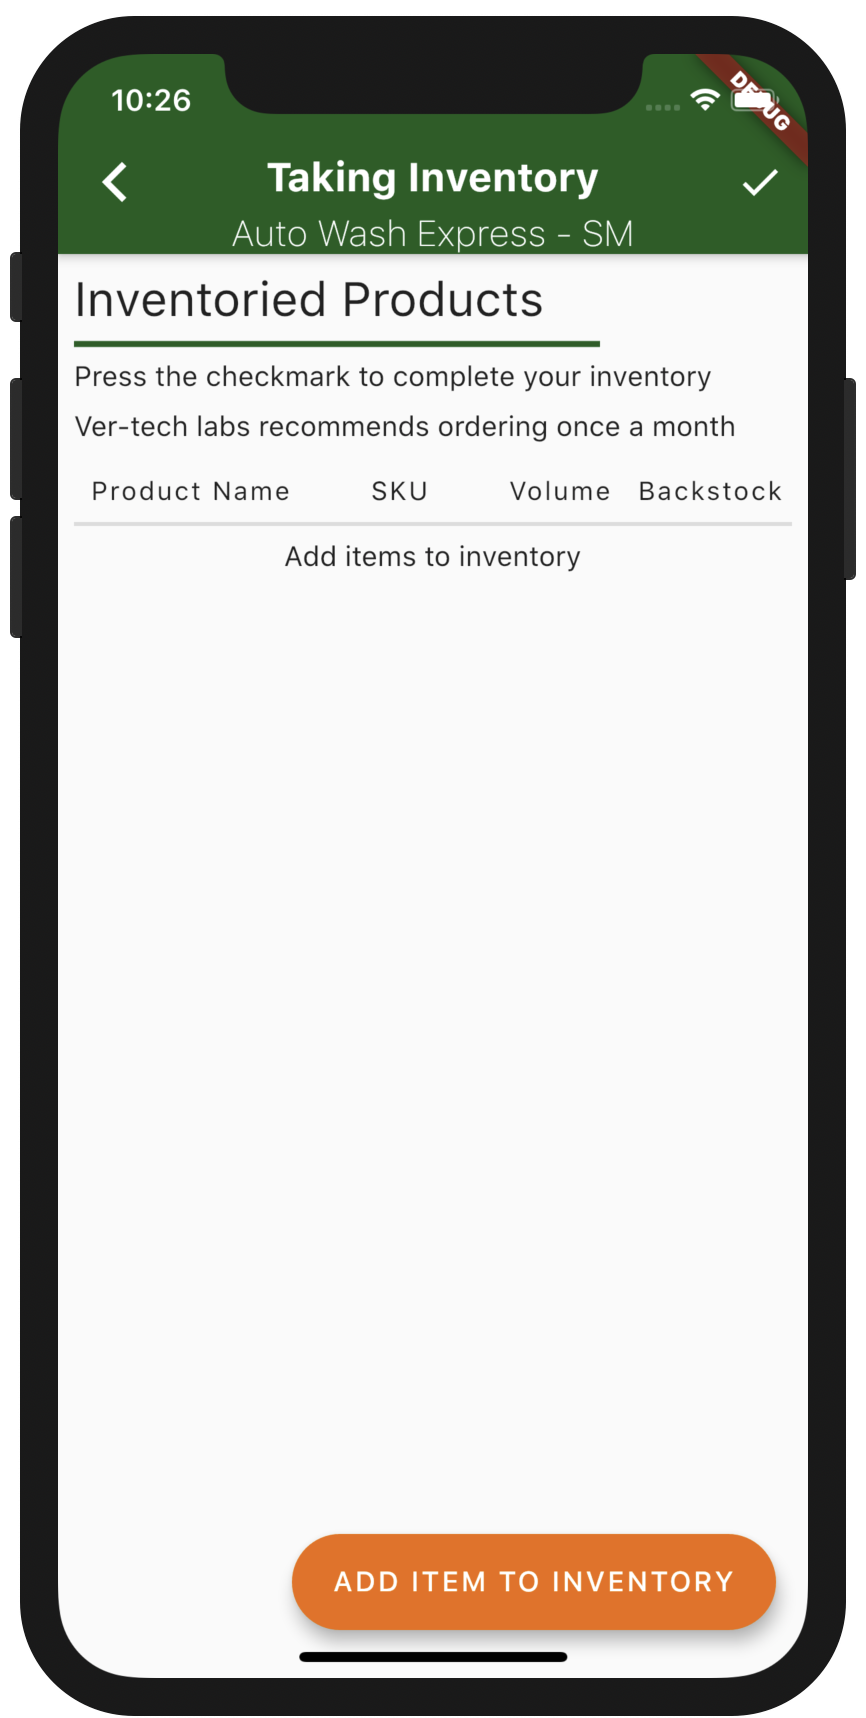
Once you've clicked the Take Inventory button, you'll be greeted with a screen of the products you have inventoried. Since we have yet to inventory any products, it will be blank.
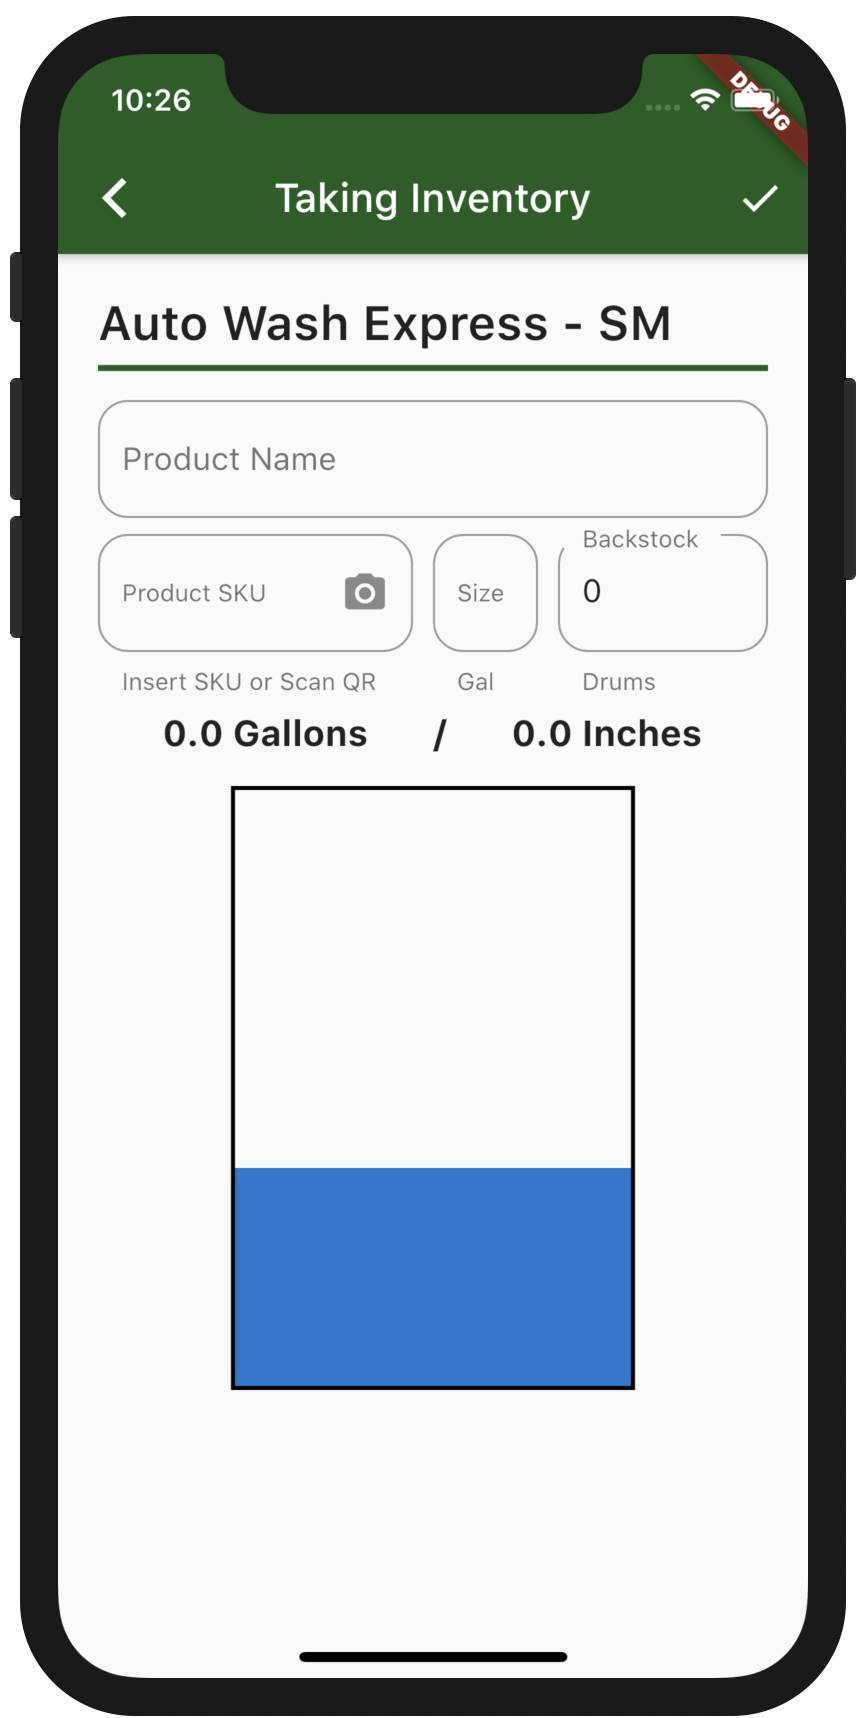
Clicking on the 'Add Item To Inventory' button will take you to this screen:

Inventorying A Product
From this screen, you have several ways to identify the product you want to start inventorying
Click on the camera icon and scan the QR code on the label
or
- Start typing in the product name, and select it from the dropdown
Once a product has been selected or scanned, it will auto fill the product name, sku, and container size.
Now you can type in the amount of unopened backstock you have on hand.
For the drum that you have online, simply swipe up from the bottom of the drum to change the blue 'fill line', and convey how full it is. Above the drum, you will see the amount of gallons remaining, as well as the inches of product remaining for common drum sizes.
note
If we don't have an inches remaining for your product, you can still submit the volume measurement.
After filling out all fields and setting the volume level, press the checkmark in the upper right corner. This will add the product to inventory, and clear out all fields to setup for adding the next product.
Inventory Review and Submission
Once you have added your products to inventory, use the chevron in the upper left to go back to the overview screen.
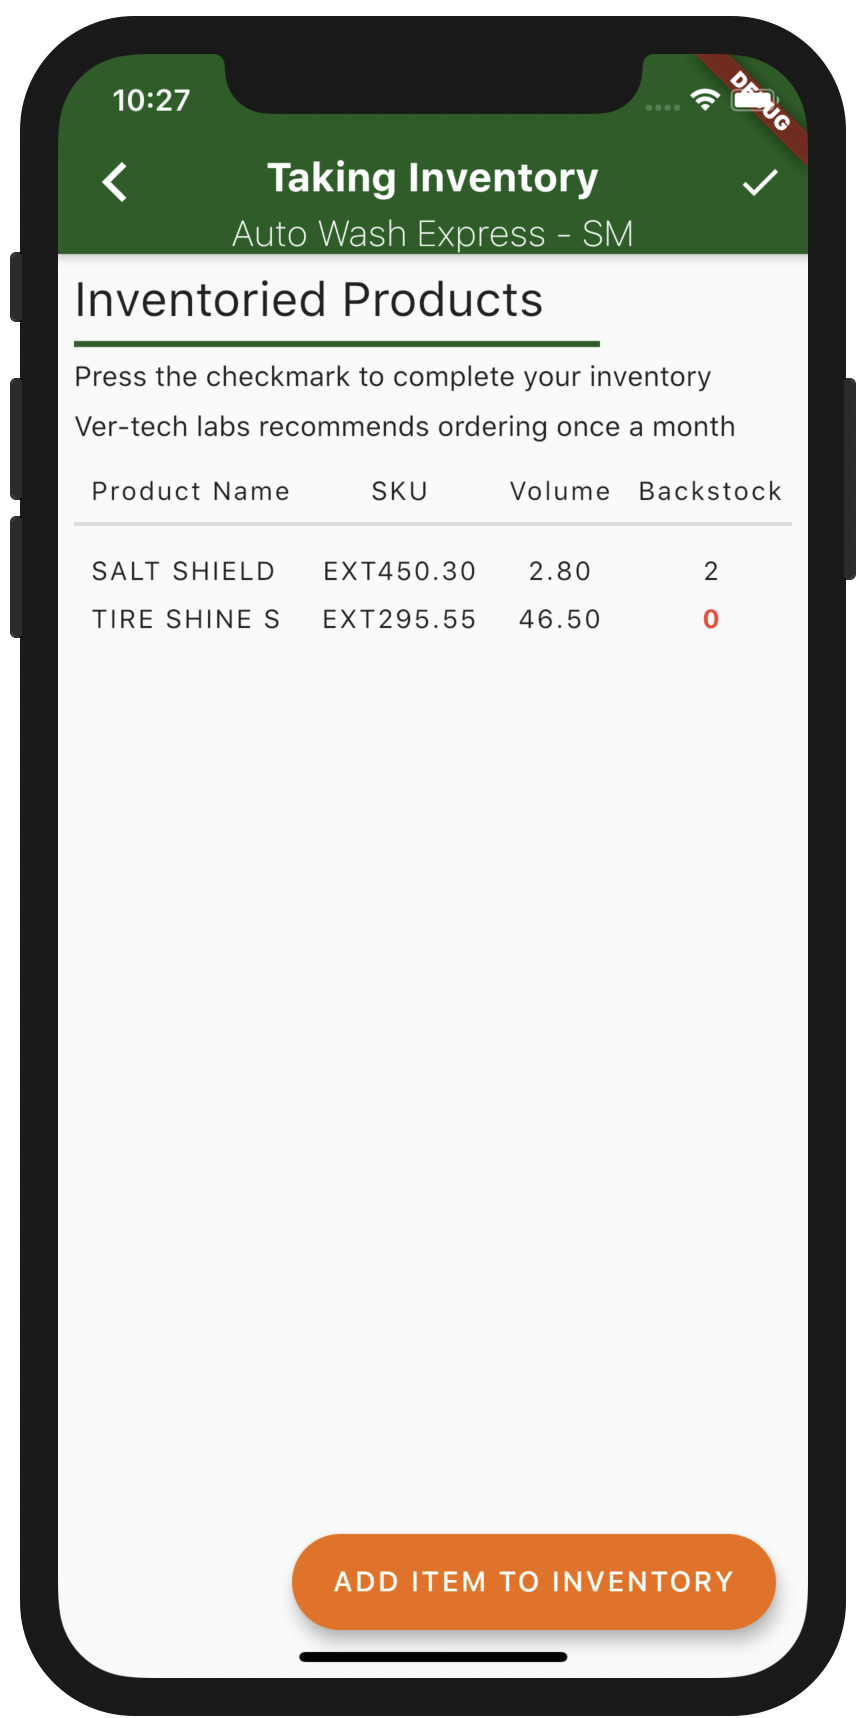
Here is an example screen, after some products have been inventoried.

If you need to inventory more products, you can click on the 'Add Item to Inventory' button and continue to add products.
If you need to remove a product from inventory, either to re-inventory it or not include it in this inventory, you can swipe on the list item to remove it.
Finally, if everything looks correct, you can hit the checkmark to complete the inventory.